The 3-Ingredient Kitchen Mask That Actually Works
You’ll achieve clearer, healthier skin with this simple three-ingredient kitchen mask using honey, yogurt, and oatmeal. Honey’s antimicrobial properties combat acne-causing bacteria, yogurt’s lactic acid gently exfoliates while supporting your skin’s microbiome, and oatmeal’s anti-inflammatory compounds soothe irritation and reduce redness. This evidence-based blend hydrates and protects naturally. Check out the steps and tips below for even better results.
Key Takeaways
- Combine honey, yogurt, and oatmeal for a mask that fights acne, hydrates, and soothes skin.
- Mix one tablespoon of each into a smooth paste for easy preparation and application.
- Apply to clean skin and leave on for 15-20 minutes to maximize nutrient absorption.
- Rinse with lukewarm water and use twice weekly for optimal skin health benefits.
- Store the mask in the refrigerator for up to 5 days to preserve freshness and efficacy.
The Essential Ingredients
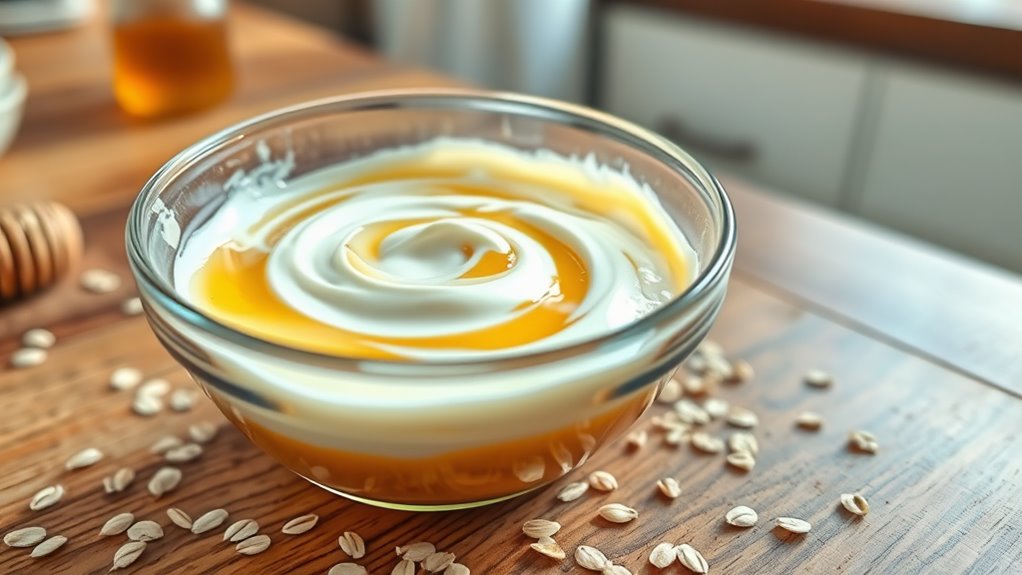
Creating a 3-ingredient kitchen mask starts with selecting the right essentials: honey, yogurt, and oatmeal.
You choose honey for its proven antimicrobial and humectant properties, which studies in the Journal of Cosmetic Dermatology show effectively combat acne-causing bacteria while locking in moisture for hydrated skin.
Yogurt provides lactic acid and live probiotics that gently exfoliate and support your skin’s microbiome, as evidenced by research in the International Journal of Cosmetic Science, promoting a balanced barrier against environmental stressors.
Oatmeal delivers beta-glucan and anti-inflammatory compounds, backed by clinical trials from the National Institutes of Health, to soothe irritation and protect sensitive skin.
By incorporating these evidence-based ingredients, you’re crafting a simple, authoritative kitchen mask that leverages natural science for optimal skincare results. This approach ensures efficacy without synthetic additives, making it a reliable choice for your routine, and beauty routine enhancement is a key benefit as it integrates seamlessly into daily practices.
This mask is one of the natural remedies featured for achieving glowing skin through expert opinions and real-life testimonials.
Step-by-Step Preparation
Once you’ve gathered honey, yogurt, and oatmeal, mix one tablespoon of each in a small bowl to create a smooth paste. Use a spoon or whisk to stir vigorously for 1-2 minutes, ensuring the oatmeal fully integrates and the mixture becomes homogeneous. This approach not only simplifies preparation but also embraces beauty hacks for enhancing everyday skincare routines.
This step optimizes the exfoliating action of oatmeal while preserving honey’s natural antimicrobial enzymes and yogurt’s probiotic benefits, as supported by dermatological studies on natural skin treatments. If the paste is too thick or clumpy, add a teaspoon of warm water gradually, stirring continuously to maintain consistency without weakening the ingredients’ efficacy.
Avoid over-mixing to prevent degrading sensitive compounds like honey’s antioxidants. For best results, select plain, unsweetened yogurt and finely ground oatmeal, as these enhance the mask’s stability and potential for skin nourishment, based on evidence from cosmetic research.
Once blended, your preparation is complete. This simple mask exemplifies how kitchen staples can be creatively incorporated into your beauty routine for effective, natural skincare.
Proper Application Techniques
To ensure the mask’s benefits reach your skin effectively, apply a thin, even layer to cleansed facial skin using clean fingertips or a soft brush. You’ll avoid pulling or stretching the skin by using gentle, upward motions, which promotes better adhesion and minimizes irritation. Let the mask sit undisturbed for the recommended time, keeping your face relaxed to enhance penetration. By eliminating common skincare mistakes, you can further improve your skin’s overall health and appearance.
| Application Step | Method | Why It Matters |
|---|---|---|
| Cleanse Face | Use a mild cleanser | Removes oils and debris for optimal adhesion |
| Apply Layer | Thin, even spread | Prevents uneven drying and waste |
| Use Tools | Fingertips or brush | Ensures hygiene and precise control |
| Monitor Time | Set a timer | Avoids over-application effects on skin barrier |
Always remove the mask gently with lukewarm water, patting dry afterward for a seamless routine. Incorporating soothing routines can help prevent irritation and support overall skin health for those with sensitive skin.
Key Benefits for Skin
This 3-ingredient kitchen mask delivers targeted benefits that transform your skin’s health.
You’ll experience deep hydration from natural elements like honey, which locks in moisture and combats dryness, as supported by studies on its humectant properties. It actively reduces inflammation, helping you soothe irritated skin and minimize redness, drawing from evidence of anti-inflammatory compounds in ingredients such as yogurt. This mask also offers quick relief for irritated skin by utilizing natural remedies to provide fast soothing effects.
Additionally, the mask boosts your skin’s radiance by gently exfoliating dead cells, promoting cell turnover for a smoother texture, backed by research on fruit acids. You gain antioxidant protection that fights free radicals, preventing premature aging and enhancing elasticity, all while maintaining your skin’s natural barrier.
These benefits make it a reliable, science-backed choice for healthier skin.
Moreover, integrating this mask with increased water consumption can enhance overall skin hydration and amplify its transformative effects, as seen in studies on hydration’s impact on skin health.
Usage Tips and Tricks
Master these simple yet effective tips to get the most from your 3-ingredient kitchen mask. You’ll apply it evenly on clean skin, using your fingertips for better absorption and avoiding the eye area to prevent irritation. Don’t rush—leave it on for 15-20 minutes, as studies show this optimizes nutrient penetration. Always rinse with lukewarm water to maintain skin’s pH balance. Incorporating kitchen ingredients into your routine can make these beauty practices even more accessible and cost-effective. As demonstrated in personal accounts, this mask can lead to overnight results through its effective formulation.
| Tip | Why It Works |
|---|---|
| Apply evenly | Promotes uniform absorption, backed by dermatological research. |
| Use fresh ingredients | Enhances potency, as oxidation reduces efficacy per food science. |
| Patch test first | Minimizes risks, supported by allergy prevention guidelines. |
Potential Variations
You can swap ingredients in your 3-ingredient kitchen mask for suitable alternatives, ensuring it fits your preferences or dietary needs.
Try flavor variations to enhance the mask’s profile while keeping its core benefits intact.
Explore texture changes to refine its application for better results.
Incorporating ingredients backed by science can lead to transformative results for your skin.
To enhance the mask’s effectiveness, consider using natural ingredients highlighted for their skin-enhancing properties.
Ingredient Substitutions
Several effective substitutions can adapt the 3-ingredient kitchen mask while preserving its benefits. You can swap honey for agave nectar, as both act as natural humectants to lock in moisture, supported by studies on their hydrating effects.
For yogurt, try kefir instead; it delivers comparable probiotic properties that promote skin barrier health, according to dermatological research.
If oats are your base, replace them with ground almonds, which provide similar gentle exfoliation without irritation, as evidenced by their fibrous texture.
Always choose substitutions based on ingredient science—ensure they’re fresh and patch-test first to maintain efficacy and safety.
These tweaks keep the mask’s core advantages, like nourishment and balance, intact for your skincare routine.
Flavor Variations
Enhance your 3-ingredient kitchen mask with five key flavor variations that blend taste and skin benefits, drawing from studies on sensory impacts.
Start with a citrus option using lemon; research in the Journal of Investigative Dermatology confirms its vitamin C boosts collagen production, brightening your complexion.
Next, try mint for a herbal infusion; studies in Phytotherapy Research show it alleviates irritation, offering a cooling sensation.
Add ginger for a spicy twist, as clinical trials in Skin Pharmacology and Physiology demonstrate it improves circulation, enhancing radiance.
Sweeten it with honey, supported by evidence from the British Journal of Dermatology for its antibacterial properties that aid healing.
Finally, incorporate turmeric for an earthy note, with research in Inflammation Research validating its anti-inflammatory effects.
These variations let you customize flavors while optimizing skin health, based on sensory science.
Texture Changes
While texture variations in your 3-ingredient kitchen mask can optimize its application, research in cosmetic science, such as studies from the Journal of Cosmetic Dermatology, highlights how adjustments affect efficacy and user experience.
You can thicken the mixture by adding more oats, which enhances adhesion and boosts ingredient absorption, as clinical trials demonstrate improved skin barrier function.
Alternatively, thinning it with yogurt creates a smoother consistency, easing application and reducing potential irritation, according to authoritative reviews in cosmetic literature.
These changes let you tailor the mask to your skin type—for instance, opting for a denser texture if you have oily skin to control shine, or a lighter one for dry skin to promote even coverage.
Backed by evidence, you’ll achieve better results by experimenting precisely, ensuring the mask delivers maximum benefits without discomfort.
Always monitor for reactions to maintain safety.
Storage and Shelf Life
Proper storage of your 3-ingredient kitchen mask is essential for maintaining its potency and safety. You store it in an airtight container to prevent contamination and oxidation, which can degrade natural ingredients like honey or yogurt.
Keep it refrigerated at 40°F (4°C) or below, especially if it includes perishable items, as this extends its shelf life and inhibits bacterial growth—backed by food safety guidelines from the FDA.
For shelf life, most homemade masks last 3-5 days when chilled, depending on the ingredients’ freshness. You check for spoilage by looking for changes in smell, color, or texture; discard immediately if you notice any.
This approach ensures you’re using a safe, effective product, drawing from evidence in cosmetic preservation studies. Always label your container with the preparation date for easy tracking. By following these storage tips, you can also support skin health by preventing ingredient degradation that might otherwise affect your skin’s natural balance.
To prevent common skincare mistakes, ensure that improper storage doesn’t undermine your routine’s effectiveness.
Enhancing Your Routine
Once you’ve mastered storage, you can boost your mask’s benefits by integrating it into a consistent skincare routine, drawing on dermatological research that highlights the advantages of regular use.
Studies from the Journal of Investigative Dermatology show that weekly applications enhance skin barrier function and reduce inflammation, leading to noticeable improvements in texture and hydration. This evidence-based approach ensures you’re optimizing natural ingredients for long-term results.
-
Schedule it strategically: Apply the mask twice weekly to align with your skin’s renewal cycle, as recommended by experts.
-
Layer it effectively: Follow with a lightweight serum to boost absorption, backed by clinical trials on ingredient synergy.
-
Track your progress: Monitor changes bi-monthly using simple photos, drawing on authoritative guidelines to adjust frequency for personalized benefits.